DIY Roof Rail Install on 2019 Ford Explorer: A Step-by-Step Guide
Are you tired of renting roof rails every time you need to haul some gear on your 2019 Ford Explorer? Well, buddy, you’re in luck because today we’re gonna tackle a DIY roof rail install that’ll save you some serious cash and give you the freedom to hit the open road whenever you want.
Why DIY Roof Rail Install on 2019 Ford Explorer?
Before we dive in, let’s talk about why a DIY roof rail install is a great idea for your 2019 Ford Explorer. First and foremost, it’s gonna save you some serious dough. Buying a roof rail system can cost upwards of $500, and if you’re not planning on using it all the time, that’s a pretty hefty price tag. By doing it yourself, you can save around 50-75% of that cost.
Another reason to go the DIY route is that it’s actually pretty easy to do. If you’ve got some basic tools and a willingness to get your hands dirty, you can have a roof rail system installed on your 2019 Ford Explorer in no time.
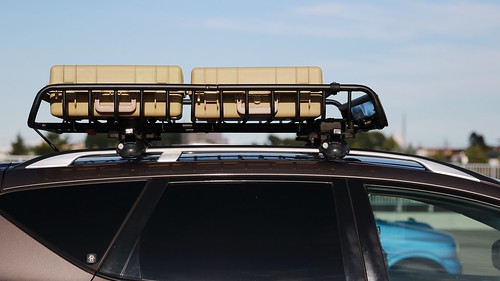
DIY Roof Rail Install on 2019 Ford Explorer: Tools and Materials
Before we start, let’s make sure you’ve got all the necessary tools and materials. Here’s what you’ll need:
- Roof rail system (you can find these online or at your local auto parts store)
- Drill and bits
- Socket wrench or ratchet and socket
- Torx screwdriver (for removing the roof trim)
- Weatherstrip adhesive (for sealing the roof trim)
- Measuring tape and pencil
Step 1: Remove the Roof Trim (DIY Roof Rail Install on 2019 Ford Explorer)
The first step in our DIY roof rail install is to remove the roof trim. This will give us access to the roof’s mounting points, which is where we’ll be attaching our roof rail system.
To remove the roof trim, you’ll need to use a Torx screwdriver to remove the screws that hold it in place. Start at one end of the roof and work your way down, removing each screw as you go.
Once you’ve removed all the screws, you should be able to gently pry the roof trim away from the roof. Be careful not to damage the trim or the roof’s surface.
Step 2: Locate the Mounting Points (DIY Roof Rail Install on 2019 Ford Explorer)
Now that we’ve removed the roof trim, it’s time to locate the mounting points for our roof rail system. These are the metal brackets that are welded to the roof’s frame, and they’re where we’ll be attaching our roof rails.
To locate the mounting points, you’ll need to use a measuring tape and pencil to mark their location on the roof. Start by measuring the distance between the mounting points on the roof rail system, and then use that measurement to mark the location of the mounting points on the roof.
Step 3: Attach the Roof Rails (DIY Roof Rail Install on 2019 Ford Explorer)
Now that we’ve located the mounting points, it’s time to attach the roof rails. To do this, you’ll need to use a drill and bits to make a few small holes in the roof’s surface.
Once you’ve made the holes, you can attach the roof rails to the mounting points using the bolts and washers that came with the roof rail system. Make sure to tighten the bolts securely, but don’t overtighten them.
Step 4: Reattach the Roof Trim (DIY Roof Rail Install on 2019 Ford Explorer)
Now that we’ve attached the roof rails, it’s time to reattach the roof trim. To do this, you’ll need to use weatherstrip adhesive to seal the roof trim to the roof’s surface.
Start by applying a thin layer of adhesive to the roof’s surface, and then press the roof trim into place. Make sure it’s securely attached, but don’t overtighten the screws.
Conclusion: DIY Roof Rail Install on 2019 Ford Explorer
And there you have it, folks! With these simple steps, you can have a roof rail system installed on your 2019 Ford Explorer in no time. Whether you’re hauling gear for a camping trip or just need some extra space for luggage, a DIY roof rail install is a great way to save money and add some extra functionality to your ride.
DIY Roof Rail Install on 2019 Ford Explorer: Tips and Tricks
- Make sure to measure carefully and mark the mounting points accurately to ensure a secure fit.
- Use a level to ensure the roof rails are straight and level.
- Apply a thin layer of weatherstrip adhesive to the roof’s surface to seal the roof trim.
- Don’t overtighten the bolts or screws, as this can damage the roof’s surface.
DIY Roof Rail Install on 2019 Ford Explorer: Frequently Asked Questions
- Q: How long does a DIY roof rail install take?
A: Depending on your level of experience and the complexity of the install, it can take anywhere from 2-5 hours. - Q: What kind of tools do I need for a DIY roof rail install?
A: You’ll need a drill and bits, socket wrench or ratchet and socket, Torx screwdriver, weatherstrip adhesive, and measuring tape and pencil. - Q: Can I install a roof rail system on my 2019 Ford Explorer if I have a sunroof?
A: Yes, but you’ll need to make sure the roof rail system is compatible with your sunroof.
DIY Roof Rail Install on 2019 Ford Explorer: Final Thoughts
A DIY roof rail install on your 2019 Ford Explorer is a great way to add some extra functionality to your ride without breaking the bank. With the right tools and a little bit of know-how, you can have a roof rail system installed in no time. So why wait? Get out there and start building!