How to Repair Aquaglide Kickitat Tear: A Step-by-Step Guide
===========================================================
Dude, we’ve all been there – you’re out on the water, having a blast on your Aquaglide Kickatat, when suddenly, disaster strikes. A tear appears out of nowhere, and you’re left wondering how to fix it. Don’t worry, bro, I’ve got you covered. In this article, we’ll walk through the process of repairing an Aquaglide Kickatat tear, so you can get back to enjoying the water in no time.
What You’ll Need
Before we dive in, make sure you’ve got the following supplies:
- Aquaglide repair kit (or a similar PVC repair kit)
- PVC glue
- PVC patching tape
- Scissors
- Cleaning cloth
- Water-based lubricant (like soap or 303)
How to Repair Aquaglide Kickitat Tear: Preparation is Key
Before you start repairing the tear, make sure the area around it is clean and dry. Use a cleaning cloth to wipe away any dirt or debris. This will ensure that the repair area is free from any contaminants that might interfere with the adhesive.
Identifying the Type of Tear
Not all tears are created equal, bro. There are two main types of tears you’ll encounter:
- Pinhole tear: A small, round hole, usually caused by a puncture from a sharp object.
- Slice tear: A longer, more linear tear, usually caused by a cut or a scratch.
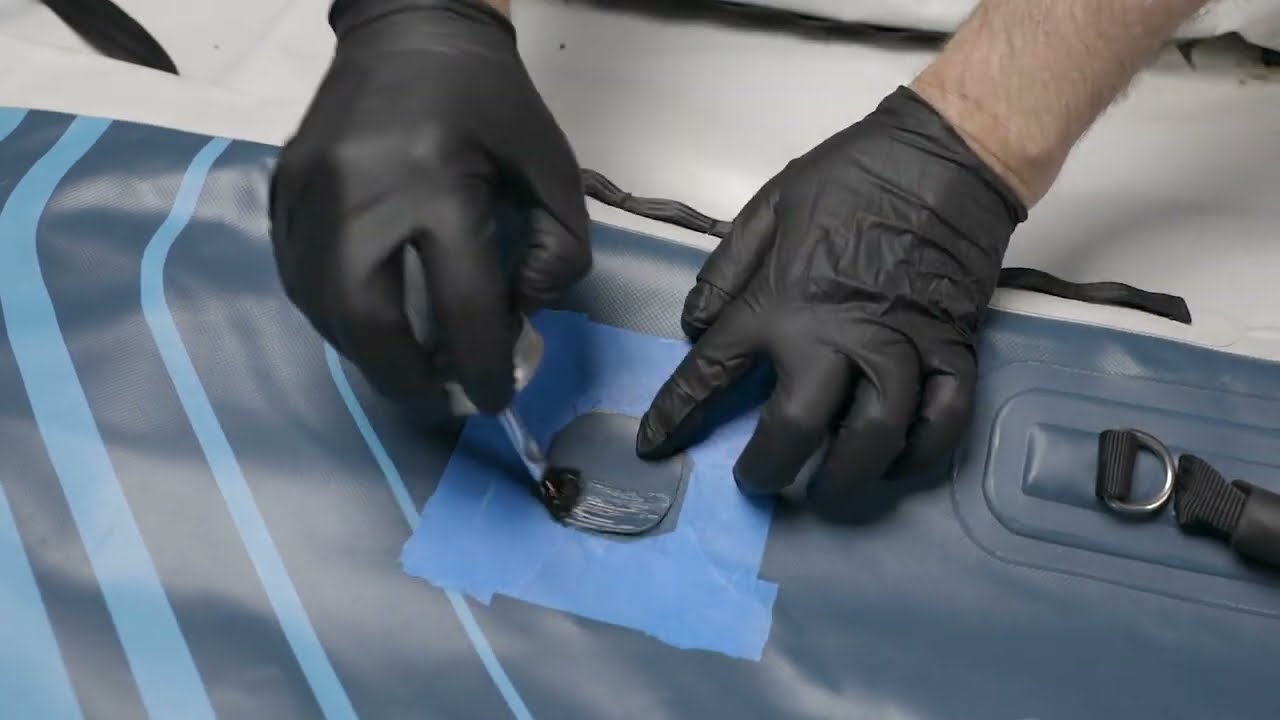
How to Repair Aquaglide Kickitat Tear: Pinhole Tear Repair
For pinhole tears, you can use a simple patching kit. Here’s how:
- Clean the area: Use a cleaning cloth to wipe away any dirt or debris around the tear.
- Apply a small amount of PVC glue: Use a small amount of PVC glue to the area around the tear. This will help the patch adhere.
- Apply the patch: Place the patch over the tear, pressing down firmly to ensure it adheres.
- Allow the glue to dry: Let the glue dry completely before moving on to the next step.
- Apply additional coats of glue: Apply additional coats of glue, allowing each coat to dry before applying the next.
- Inspect the repair: Once the final coat of glue has dried, inspect the repair to ensure it’s holding.
How to Repair Aquaglide Kickitat Tear: Slice Tear Repair
For slice tears, you’ll need to use a more substantial patching kit. Here’s how:
- Clean the area: Use a cleaning cloth to wipe away any dirt or debris around the tear.
- Apply a bead of PVC glue: Use a bead of PVC glue to the area around the tear.
- Apply the patch: Place the patch over the tear, pressing down firmly to ensure it adheres.
- Allow the glue to dry: Let the glue dry completely before moving on to the next step.
- Apply additional coats of glue: Apply additional coats of glue, allowing each coat to dry before applying the next.
- Reinforce the area: Use PVC patching tape to reinforce the area around the tear. Apply multiple layers of tape, overlapping each layer to ensure maximum strength.
- Inspect the repair: Once the final coat of glue has dried, inspect the repair to ensure it’s holding.
How to Repair Aquaglide Kickitat Tear: Advanced Repair Techniques
Sometimes, you’ll encounter tears that are a little more complicated. In these cases, you’ll need to use some advanced repair techniques. Here are a few:
- PVC welding: Use a PVC welding kit to fuse the tear closed. This method is more time-consuming, but it creates a permanent bond.
- Multi-layer patching: Use multiple layers of patches to build up a strong repair area. This method is great for larger tears.
- Using a patching kit with reinforcement: Use a patching kit that includes reinforcement material, like a metal plate. This method is great for high-stress areas.
How to Repair Aquaglide Kickitat Tear: Tips and Tricks
Here are a few tips and tricks to keep in mind:
- Always clean the area: Make sure the area around the tear is clean and dry before starting the repair.
- Use the right glue: Use a PVC-specific glue that’s designed for water-based repairs.
- Don’t overdo it: Don’t apply too much glue or tape, as this can create a weak spot in the repair.
- Test the repair: Before putting the Kickatat back in the water, test the repair by inflating it and checking for air leaks.
Conclusion
Dude, repairing an Aquaglide Kickatat tear is easier than you think. With the right supplies and a little know-how, you can have your Kickatat back in the water in no time. Remember to always clean the area, use the right glue, and don’t overdo it. And if you’re not comfortable with the repair, don’t hesitate to seek professional help.
How to Repair Aquaglide Kickitat Tear? Now You Know!
Bro, I hope this article has helped you learn how to repair an Aquaglide Kickatat tear. Whether you’re a seasoned water sports enthusiast or just starting out, knowing how to fix a tear can save you time and money. So, go ahead and get back out there on the water – your Kickatat (and your wallet) will thank you!