How to Repair a Blend Door Actuator: A Step-by-Step Guide
What’s a Blend Door Actuator?
If you’re reading this, chances are you’re dealing with a faulty blend door actuator in your vehicle. You might be wondering, "What’s a blend door actuator?" Well, let me break it down for you. A blend door actuator is a crucial component in your car’s HVAC (heating, ventilation, and air conditioning) system. Its primary function is to control the blend door, which mixes hot and cold air to provide the perfect temperature for your ride.
Symptoms of a Faulty Blend Door Actuator
Before we dive into the repair process, let’s discuss some common symptoms of a faulty blend door actuator:
- Your car’s temperature control is wonky, or it’s stuck on one setting.
- You hear a clicking or grinding noise when you adjust the temperature.
- The temperature changes randomly, even when you don’t touch the controls.
- Your car’s HVAC system is blowing hot air when it’s supposed to be cold, or vice versa.
Tools and Materials Needed
To repair a blend door actuator, you’ll need the following tools and materials:
- A screwdriver (preferably Torx and Phillips)
- A wrench or socket set
- A new blend door actuator (if your old one is beyond repair)
- Electrical tape or connectors (for wire repair)
- A multimeter (optional, but recommended for electrical troubleshooting)
How to Repair a Blend Door Actuator: Step-by-Step Instructions
Step 1: Locate the Blend Door Actuator
The first step in repairing a blend door actuator is to locate it. Depending on your vehicle’s make and model, the actuator might be situated in different areas. Typically, you can find it:
- Behind the dashboard, near the HVAC controls
- In the glove compartment or dashboard trim
- Under the hood, near the HVAC air intake
Consult your vehicle’s repair manual or online resources for specific location information.
Step 2: Remove Access Panels and Trim
To access the blend door actuator, you’ll need to remove some access panels and trim. This will give you a clear path to the actuator.
- Remove screws, clips, or other fasteners holding the panels in place.
- Gently pull the panels away from the dash or trim.
- Set the panels aside, taking care not to damage any electrical connections or wiring.
How to Repair a Blend Door Actuator: Removing Access Panels and Trim
Step 3: Disconnect Electrical Connections
Now that you have access to the blend door actuator, it’s time to disconnect the electrical connections.
- Identify the wires connected to the actuator. You might need to consult your repair manual or online resources for specific wire info.
- Use a wrench or pliers to loosen any wire nuts or connectors.
- Carefully pull the wires away from the actuator.
Step 4: Remove the Actuator
With the electrical connections disconnected, you can now remove the blend door actuator.
- Use a screwdriver to remove any screws or fasteners holding the actuator in place.
- Gently pull the actuator away from the HVAC housing or other components.
- Set the actuator aside, taking care not to damage any surrounding components.
How to Repair a Blend Door Actuator: Tips and Tricks
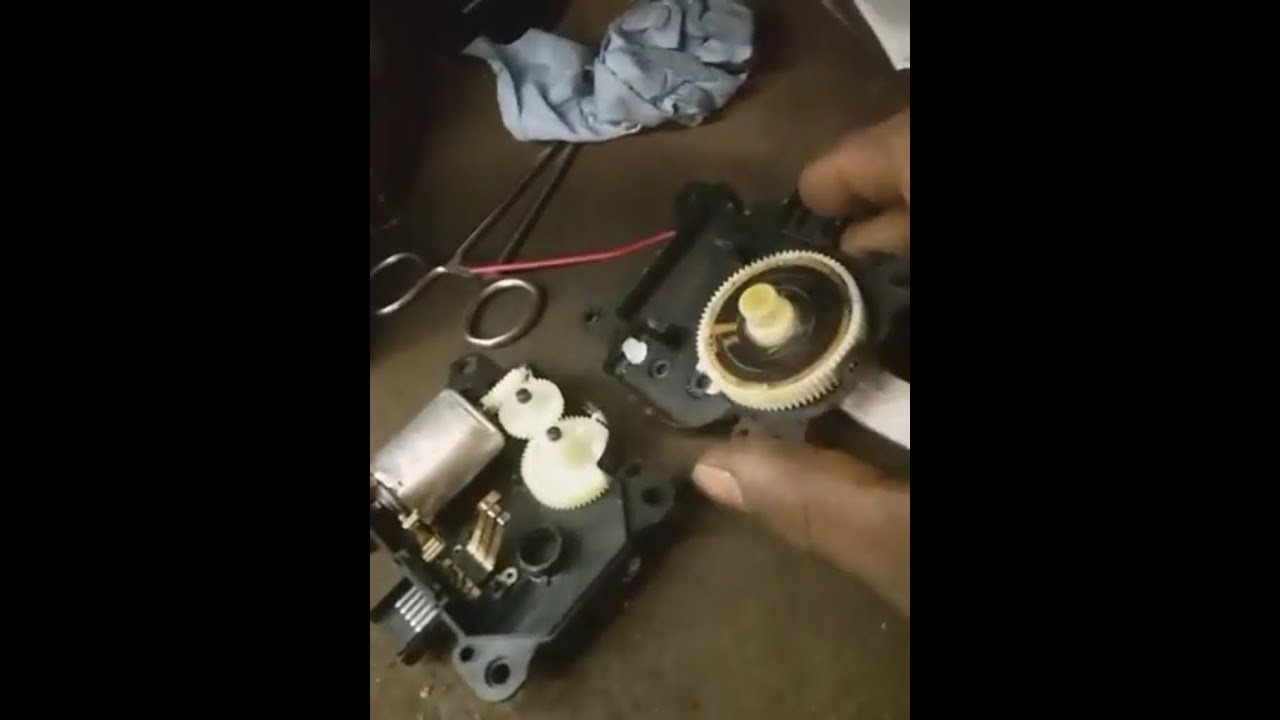
Step 5: Inspect and Clean the Actuator
If you’re trying to repair the existing actuator, now’s the time to inspect and clean it.
- Use compressed air or a small brush to clean out any debris or dust.
- Inspect the actuator’s electrical connections for any signs of wear or damage.
- Use electrical tape or connectors to repair any damaged wires.
Step 6: Replace the Actuator (if necessary)
If your blend door actuator is beyond repair, it’s time to install a new one.
- Consult your repair manual or online resources for specific installation instructions.
- Install the new actuator, ensuring all screws and fasteners are secure.
- Reconnect any electrical connections, making sure they’re secure and not loose.
How to Repair a Blend Door Actuator: Replacing the Actuator
Step 7: Reassemble Everything
Now that you’ve repaired or replaced the blend door actuator, it’s time to reassemble everything.
- Reverse the steps to reinstall the access panels and trim.
- Reconnect any electrical connections you disconnected earlier.
- Ensure all screws, fasteners, and clips are secure and in place.
Step 8: Test the Repair
The final step is to test your repair.
- Turn on the engine and HVAC system.
- Test the temperature controls, ensuring they’re working smoothly and efficiently.
- Check for any unusual noises or vibrations.
How to Repair a Blend Door Actuator: Final Inspection
Troubleshooting Tips
If you’re still experiencing issues with your blend door actuator after repair, here are some troubleshooting tips:
- Consult your repair manual or online resources for specific troubleshooting guides.
- Check for any loose or damaged electrical connections.
- Inspect the actuator’s mechanical components for any signs of wear or damage.
How to Repair a Blend Door Actuator: Additional Resources
If you’re not comfortable with this repair or need additional guidance, consider consulting a professional mechanic or online forums. There are many resources available to help you troubleshoot and repair your blend door actuator.
Closing Thoughts: How to Repair a Blend Door Actuator
Repairing a blend door actuator is a relatively straightforward process that can save you money and ensure your car’s HVAC system is working efficiently. Remember to take your time, be patient, and consult your repair manual or online resources if needed. With these steps and tips, you’ll be well on your way to repairing your blend door actuator like a pro!