How to Repair Cracked Porcelain Sink
=====================================
Hey there, DIY enthusiasts and homeowners. Are you dealing with a cracked porcelain sink and unsure of what to do? Don’t worry, you’re in the right place. In this article, we’ll walk you through the steps on how to repair cracked porcelain sink like a pro.
Assessing the Damage
Before you start repairing your cracked porcelain sink, you need to assess the damage. Take a closer look at the crack and determine its length, width, and depth. This will help you decide on the best course of action.
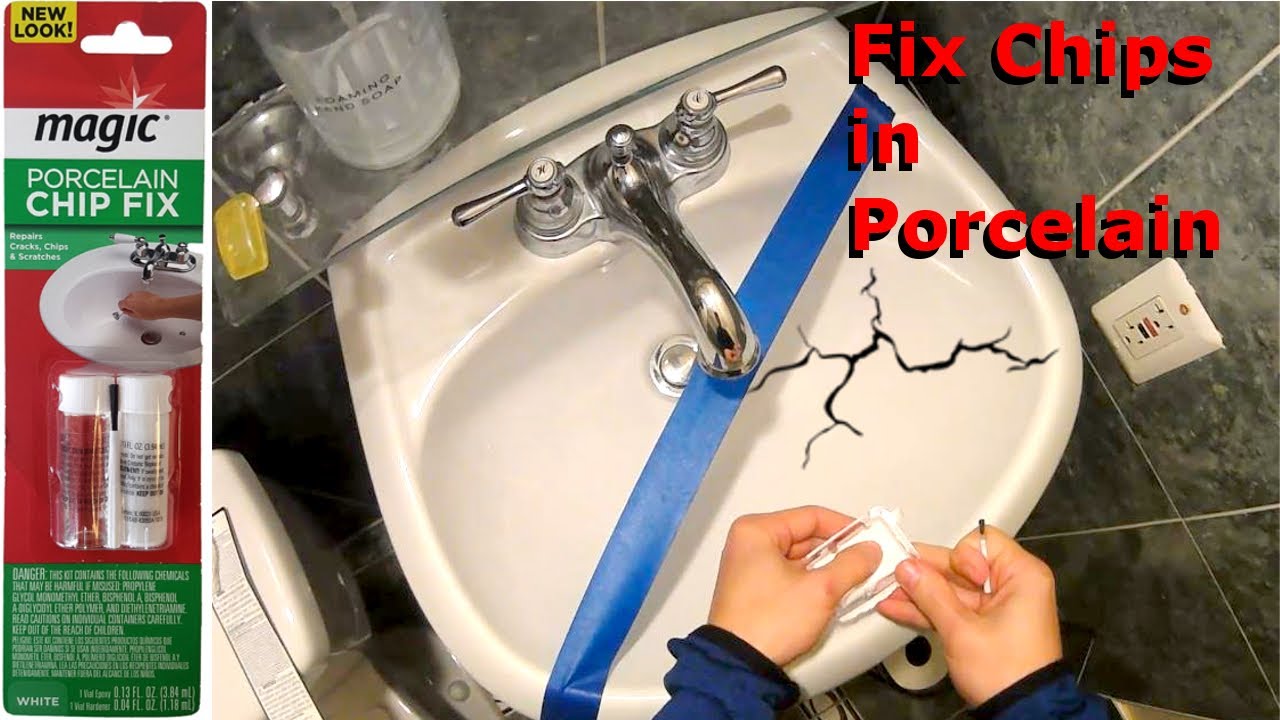
If the crack is shallow and only affects the glaze, you might be able to repair it with a simple porcelain repair kit. However, if the crack is deep and extends to the sink’s underlying material, you may need to replace the entire sink.
Types of Cracks
There are several types of cracks that can occur in a porcelain sink, including:
- Hairline cracks: These are small, thin cracks that only affect the glaze.
- Stress cracks: These occur due to stress or pressure on the sink.
- Impact cracks: These occur due to a sudden impact or blow to the sink.
How to Repair Cracked Porcelain Sink: Preparation
Now that you’ve assessed the damage, it’s time to prepare for the repair. Here are the materials you’ll need:
- Porcelain repair kit: This usually includes a special adhesive, a filler material, and a sealant.
- Ceramic tile adhesive: This is used to attach small broken pieces of porcelain back to the sink.
- Acrylic paint: This is used to touch up any areas where the repair kit doesn’t match the original color.
- Soft cloth: This is used to apply the adhesive and filler material.
Before you start the repair, make sure the sink is clean and dry. Any dirt or moisture can interfere with the adhesive and filler material.
Filling the Crack
Now it’s time to fill the crack. Here’s how to repair cracked porcelain sink by filling the crack:
Step 1: Apply the Adhesive
Apply a small amount of adhesive to the crack using a soft cloth. Make sure to cover the entire area, but avoid applying too much adhesive.
Step 2: Apply the Filler Material
Apply a small amount of filler material to the crack using a soft cloth. Press the filler material firmly into the crack, making sure it’s flush with the surrounding surface.
Step 3: Allow the Filler Material to Dry
Allow the filler material to dry completely, according to the manufacturer’s instructions. This can take anywhere from 30 minutes to an hour.
Step 4: Sand the Area
Use a soft cloth to sand the area, feathering the edges of the repair so it blends in with the surrounding surface.
Rebuilding the Glaze
If the crack has affected the glaze, you may need to rebuild it. Here’s how to repair cracked porcelain sink by rebuilding the glaze:
Step 1: Apply a Thin Layer of Glaze
Apply a thin layer of glaze to the affected area using a soft cloth. Make sure to cover the entire area, but avoid applying too much glaze.
Step 2: Allow the Glaze to Dry
Allow the glaze to dry completely, according to the manufacturer’s instructions. This can take anywhere from 30 minutes to an hour.
Step 3: Apply Multiple Coats
Apply multiple coats of glaze, allowing each coat to dry before applying the next one. This will help build up the glaze to its original thickness.
Touching Up the Color
If the repair kit doesn’t match the original color of the sink, you may need to touch it up. Here’s how to repair cracked porcelain sink by touching up the color:
Step 1: Choose the Right Paint
Choose an acrylic paint that matches the original color of the sink.
Step 2: Apply the Paint
Apply the paint to the affected area using a soft cloth. Make sure to cover the entire area, but avoid applying too much paint.
Step 3: Allow the Paint to Dry
Allow the paint to dry completely, according to the manufacturer’s instructions. This can take anywhere from 30 minutes to an hour.
Sealing the Repair
Once the repair is complete, you’ll need to seal it. Here’s how to repair cracked porcelain sink by sealing the repair:
Step 1: Apply a Thin Layer of Sealant
Apply a thin layer of sealant to the affected area using a soft cloth. Make sure to cover the entire area, but avoid applying too much sealant.
Step 2: Allow the Sealant to Dry
Allow the sealant to dry completely, according to the manufacturer’s instructions. This can take anywhere from 30 minutes to an hour.
Step 3: Apply Multiple Coats
Apply multiple coats of sealant, allowing each coat to dry before applying the next one. This will help protect the repair and extend the life of the sink.
Conclusion
Repairing a cracked porcelain sink can be a challenging task, but with the right materials and techniques, it’s definitely doable. By following the steps outlined in this article, you should be able to repair your cracked porcelain sink like a pro.
Remember, prevention is the best way to avoid a cracked porcelain sink in the first place. Regular maintenance and care can go a long way in extending the life of your sink.
If you’re not comfortable with DIY repairs or if the crack is severe, it’s always best to consult a professional plumber or ceramicist.
How to repair cracked porcelain sink is a skill that requires patience, attention to detail, and the right materials. With practice and experience, you’ll be able to repair your cracked porcelain sink like a pro and enjoy a beautiful, functional sink for years to come.