How to Repair Flaking Leather: A Step-by-Step Guide
=====================================================
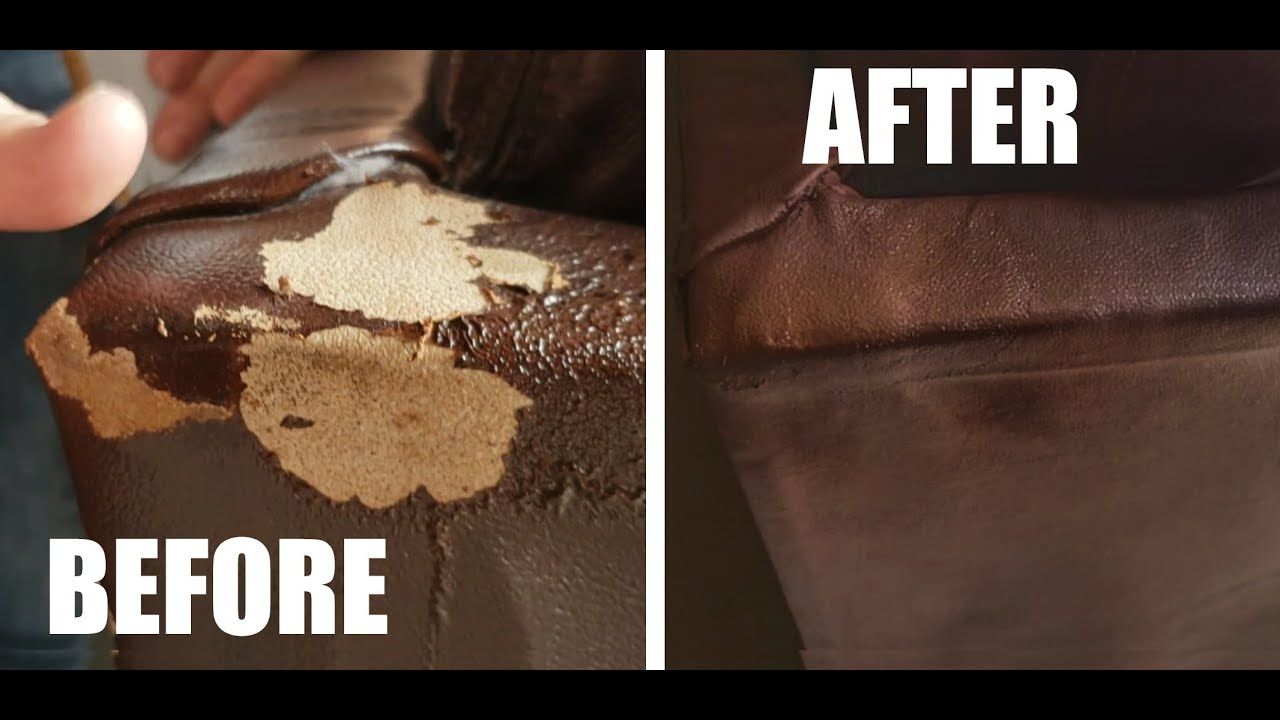
Are you tired of dealing with flaking leather on your favorite jacket, shoes, or furniture? Flaking leather can be super frustrating, but don’t worry, we’ve got you covered. In this article, we’ll show you how to repair flaking leather like a pro.
Understanding Flaking Leather
Before we dive into the repair process, it’s essential to understand what causes flaking leather in the first place. Flaking leather occurs when the leather’s finish starts to break down, resulting in a flaky, cracked surface. This can be caused by a variety of factors, including:
- Dryness: Leather needs moisture to stay healthy, and dryness can cause it to flake and crack.
- Wear and tear: Heavy use can cause leather to flake, especially in high-friction areas like elbows and knees.
- Poor quality leather: Cheap or low-quality leather can flake more easily than high-quality leather.
Preparing Your Leather for Repair
Before you start repairing your flaking leather, you’ll need to prepare it for the process. Here’s what you need to do:
Clean the Leather
How to repair flaking leather starts with a good cleaning. Use a soft-bristled brush to gently remove any dirt or debris from the surface of the leather. Then, use a gentle leather cleaner to wipe down the leather, paying special attention to the flaking areas.
Condition the Leather
After cleaning the leather, it’s time to condition it. Use a leather conditioner specifically designed for the type of leather you’re working with (e.g., aniline, semi-aniline, etc.). Apply the conditioner to the leather using a soft cloth, gently rubbing it into the surface.
Allow the Leather to Dry
How to repair flaking leather requires patience, so let the leather dry completely before moving on to the next step. This can take anywhere from a few hours to overnight, depending on the thickness of the leather and the humidity in your workspace.
Repairing Flaking Leather with Leather Filler
Now that your leather is clean and conditioned, it’s time to repair the flaking areas. Here’s how:
Apply Leather Filler
Use a leather filler specifically designed for flaking leather to fill in the damaged areas. Apply the filler using a small, pointed brush, working in small areas at a time. Make sure to fill the entire flaking area, but avoid overfilling, as this can create a raised surface.
Allow the Filler to Dry
Let the filler dry completely before moving on to the next step. This can take anywhere from 30 minutes to an hour, depending on the type of filler you’re using.
Sand the Filled Area
Use a fine-grit sandpaper to gently sand the filled area, feathering it out to create a smooth surface. How to repair flaking leather requires patience and attention to detail, so take your time and work slowly.
Apply Additional Coats of Filler
If necessary, apply additional coats of filler to the flaking area, allowing each coat to dry completely before sanding.
Repairing Flaking Leather with Leather Patching
If the flaking area is too large to fill with leather filler, you may need to use a leather patch to repair it. Here’s how:
Cut Out the Damaged Area
Use a sharp utility knife or scissors to carefully cut out the flaking area, removing any loose or damaged leather.
Cut a Leather Patch
Cut a leather patch to match the shape and size of the damaged area, leaving a small margin around the edges.
Apply Adhesive to the Patch
Apply a small amount of leather adhesive to the patch, making sure to cover the entire surface.
Attach the Patch to the Leather
Carefully attach the patch to the leather, applying even pressure to ensure it adheres properly.
Allow the Adhesive to Dry
Let the adhesive dry completely before moving on to the next step. This can take anywhere from 30 minutes to an hour, depending on the type of adhesive you’re using.
Finishing Touches
Now that you’ve repaired your flaking leather, it’s time to add some finishing touches. Here’s what you need to do:
Apply a Leather Sealant
Use a leather sealant to protect the leather from further damage and flaking. Apply the sealant using a soft cloth, gently rubbing it into the surface.
Buff the Leather
Use a leather buffing wheel or a soft cloth to buff the leather, creating a smooth, even surface.
Condition the Leather
Finally, apply a leather conditioner to the leather, paying special attention to the repaired areas.
Conclusion
How to repair flaking leather may seem like a daunting task, but with the right tools and techniques, you can fix flaking leather like a pro. Remember to take your time, work patiently, and use the right products for the job. If you’re not comfortable attempting the repair yourself, don’t hesitate to seek the help of a professional leather repair technician.
How to repair flaking leather and maintain it requires regular cleaning, conditioning, and protection. By following these steps, you can keep your leather looking its best and prevent flaking from occurring in the future.
How to repair flaking leather requires attention to detail and patience. Take your time and work slowly, using the right tools and techniques to achieve professional results.