DIY Bounce Board Photography 101: A Beginner’s Guide
Are you tired of harsh shadows and unflattering light in your photos? Look no further than DIY bounce board photography. In this article, we’ll show you how to create your own bounce board and use it to take stunning photos.
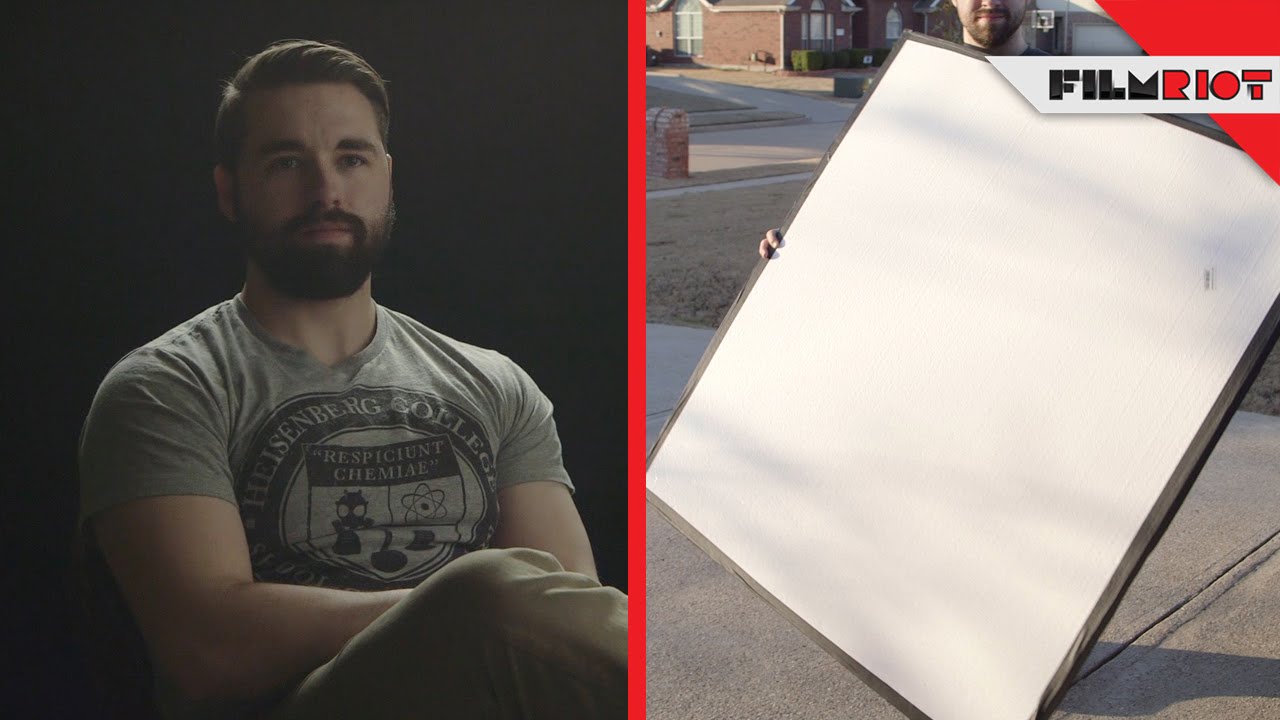
What is a Bounce Board?
A bounce board is a simple tool used to reflect light onto your subject. It’s called a "bounce" board because it bounces the light around, creating a soft, natural glow. You can use a bounce board to add fill light to your subject, reduce shadows, and create a more flattering and natural light.
Why DIY Bounce Board Photography?
Using a bounce board in your photography is a game-changer. Here are just a few reasons why:
- Soft, Natural Light: A bounce board creates a soft, natural light that is much more flattering than harsh direct light.
- Reduced Shadows: By bouncing light onto your subject, you can reduce shadows and create a more even lighting ratio.
- Easy to Use: Creating and using a bounce board is simple and easy, even for beginners.
- Cost-Effective: Creating your own bounce board is much cheaper than buying one.
How to Create a DIY Bounce Board
Creating a bounce board is easy and can be done with just a few simple materials. Here’s what you’ll need:
- Foam Core or Cardboard: You can use either foam core or cardboard as the base of your bounce board.
- White Paper or Fabric: You’ll need something white to reflect the light. You can use white paper, fabric, or even a white t-shirt.
- Scissors: You’ll need scissors to cut your materials to size.
- Glue or Tape: You’ll need something to attach the white paper or fabric to the foam core or cardboard.
Step 1: Cut Your Base Material
Cut your foam core or cardboard to the size you want your bounce board to be. A good size is around 12" x 12" or 18" x 24".
Step 2: Cut Your Reflective Material
Cut your white paper or fabric to the same size as your base material.
Step 3: Attach the Reflective Material
Use glue or tape to attach the reflective material to the base material.
Step 4: Add a Handle
If you want, you can add a handle to your bounce board to make it easier to hold and maneuver.
How to Use Your DIY Bounce Board
Using your bounce board is easy. Here are a few tips to get you started:
- Position the Bounce Board: Place the bounce board near your subject, angled so that it reflects the light onto their face or body.
- Adjust the Bounce Board: Experiment with different angles and positions to find the one that works best for your shot.
- Use it to Fill in Shadows: Use the bounce board to fill in shadows and create a more even lighting ratio.
- Use it to Create Catchlights: Use the bounce board to create catchlights in your subject’s eyes.
Tips and Tricks for DIY Bounce Board Photography
Here are a few tips and tricks to help you get the most out of your DIY bounce board:
- Experiment with Different Angles: Experiment with different angles and positions to find the one that works best for your shot.
- Use it in Conjunction with Other Light Sources: Use the bounce board in conjunction with other light sources to create a more complex and interesting lighting setup.
- Pay Attention to the Color Temperature: Pay attention to the color temperature of your light sources and the bounce board to ensure that they match.
- Practice, Practice, Practice: The more you practice using your bounce board, the more comfortable you’ll become with it.
Common Mistakes to Avoid in DIY Bounce Board Photography
Here are a few common mistakes to avoid when using a bounce board:
- Not Angling the Bounce Board Correctly: Make sure to angle the bounce board so that it reflects the light onto your subject’s face or body.
- Using the Wrong Material: Make sure to use a white or light-colored material to reflect the light.
- Not Adjusting for Different Lighting Situations: Make sure to adjust the bounce board for different lighting situations, such as using it indoors or outdoors.
DIY Bounce Board Photography for Different Genres
Here are a few ways to use DIY bounce board photography for different genres:
- Portrait Photography: Use the bounce board to create a soft, natural light that is flattering for portraits.
- Still Life Photography: Use the bounce board to create a soft, natural light that highlights the textures and details of your subject.
- Product Photography: Use the bounce board to create a soft, natural light that showcases the product in a flattering way.
Conclusion
DIY bounce board photography is a simple and effective way to improve your photography. By creating your own bounce board and using it to reflect light onto your subject, you can create soft, natural light that is much more flattering than harsh direct light. With practice and experimentation, you can master the art of DIY bounce board photography and take your photos to the next level.
Final Thoughts on DIY Bounce Board Photography
DIY bounce board photography is a fun and creative way to take your photography to the next level. With a little practice and experimentation, you can master the art of DIY bounce board photography and create stunning photos that showcase your subject in the best possible light. So why not give it a try? Grab some foam core, white paper, and scissors, and start creating your own DIY bounce board today!