How to Repair ABS Module
=====================================
Table of Contents
- What is ABS Module
- Symptoms of a Bad ABS Module
- Tools and Materials Needed
- Step-by-Step Guide to Repair ABS Module
- Troubleshooting Tips
- Conclusion
What is ABS Module
You and me know that driving can be a real challenge, especially when it comes to safety. That’s where the ABS (Anti-lock Braking System) module comes in. This little device is responsible for controlling the brakes on your ride, making sure you can stop in time without skidding or losing control. So, how to repair ABS module is a crucial question.
The ABS module is usually located under the hood, near the brake master cylinder. It’s connected to a series of sensors and relays that help it monitor the speed and movement of your wheels. When you press the brake pedal, the ABS module kicks in, rapidly pumping the brakes to prevent the wheels from locking up.
Symptoms of a Bad ABS Module
So, how do you know if your ABS module is on the fritz? Here are some telltale symptoms to look out for:
- The ABS light on your dashboard starts blinking or stays on
- You hear a clicking or grinding noise when you press the brake pedal
- Your brakes feel spongy or mushy
- Your ride starts to skid or lose traction when you brake
If you notice any of these symptoms, it’s time to take action. How to repair ABS module is a DIY-friendly process, but it does require some basic mechanical skills and tools.
Tools and Materials Needed
Here’s a list of the tools and materials you’ll need to repair your ABS module:
- A new ABS module (if your old one is beyond repair)
- Brake cleaner
- Contact cleaner
- Electrical tape
- Wire nuts
- Torx screwdriver
- Phillips screwdriver
- Socket set
- Pliers
Make sure you have all these tools and materials ready before starting the repair process.
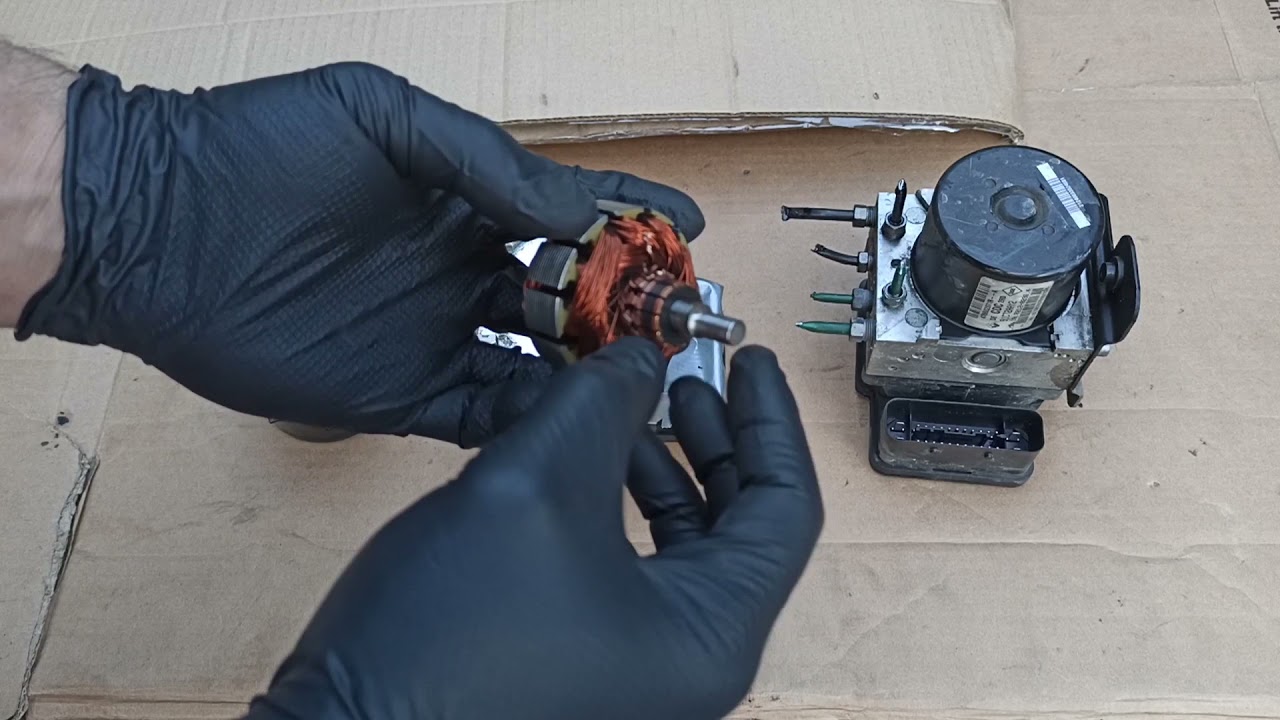
Step-by-Step Guide to Repair ABS Module
Step 1: Locate the ABS Module
The first step is to find the ABS module on your ride. It’s usually located under the hood, near the brake master cylinder. Take a look at your repair manual or online resources if you’re not sure where to find it.
Step 2: Disconnect the Battery
Before you start tinkering with the ABS module, make sure to disconnect the battery to prevent any electrical shocks or damage. Locate the negative battery terminal and remove the cable.
Step 3: Remove the ABS Module
Use a Torx screwdriver to remove the screws holding the ABS module in place. Gently pull the module out of its housing and set it aside.
Step 4: Clean the Electrical Connectors
Use brake cleaner and a cloth to clean the electrical connectors on the ABS module. Make sure they’re free of corrosion and dirt.
Step 5: Replace the Faulty Component
If you’ve identified a faulty component on your ABS module, now’s the time to replace it. Use a soldering iron and some electrical tape to secure the new component in place.
Step 6: Reassemble the ABS Module
Put everything back together in reverse order. Make sure all the screws and connections are secure.
Step 7: Reconnect the Battery
Reconnect the negative battery terminal and start the engine. Test the brakes to make sure everything is working smoothly.
How to repair ABS module is a relatively straightforward process. Just remember to take your time and be methodical in your approach.
Troubleshooting Tips
If you’re still having trouble with your ABS module after completing the repair, here are some troubleshooting tips to keep in mind:
- Check the brake fluid level and top it off if necessary
- Use a scan tool to diagnose any issues with the ABS module
- Consult online forums or repair manuals for specific advice on your make and model
- Consider taking your ride to a professional mechanic if you’re not comfortable with DIY repairs
Conclusion
How to repair ABS module is a DIY-friendly process that can save you time and money. By following this step-by-step guide, you’ll be able to get your ride back on the road in no time. Just remember to stay safe and take your time when working with electrical and mechanical components. Happy repairing!