How to Repair Aquaglide Kickitat
====================================================
Hey there, water enthusiasts. If you’re having trouble with your Aquaglide Kickitat, you’re in the right place. In this article, we’ll walk you through how to repair Aquaglide Kickitat and get you back out on the water in no time.
Before You Start
Before you begin the repair process, make sure you’ve got the following things:
- Your Aquaglide Kickitat
- A repair kit (available from Aquaglide or online retailers)
- A clean, dry workspace
- Some basic tools like a screwdriver, pliers, and a wrench
- A bit of patience and some know-how (don’t worry, we’ve got you covered)
Common Issues with Aquaglide Kickitat
The Aquaglide Kickitat is a high-quality, durable product, but like any inflatable, it’s not immune to damage. Here are some common issues you might encounter:
- Leaks or punctures
- Valve problems
- Seam failures
- Footrest or foothold damage
Don’t worry, these issues are all relatively easy to fix, and we’ll cover each one in detail below.
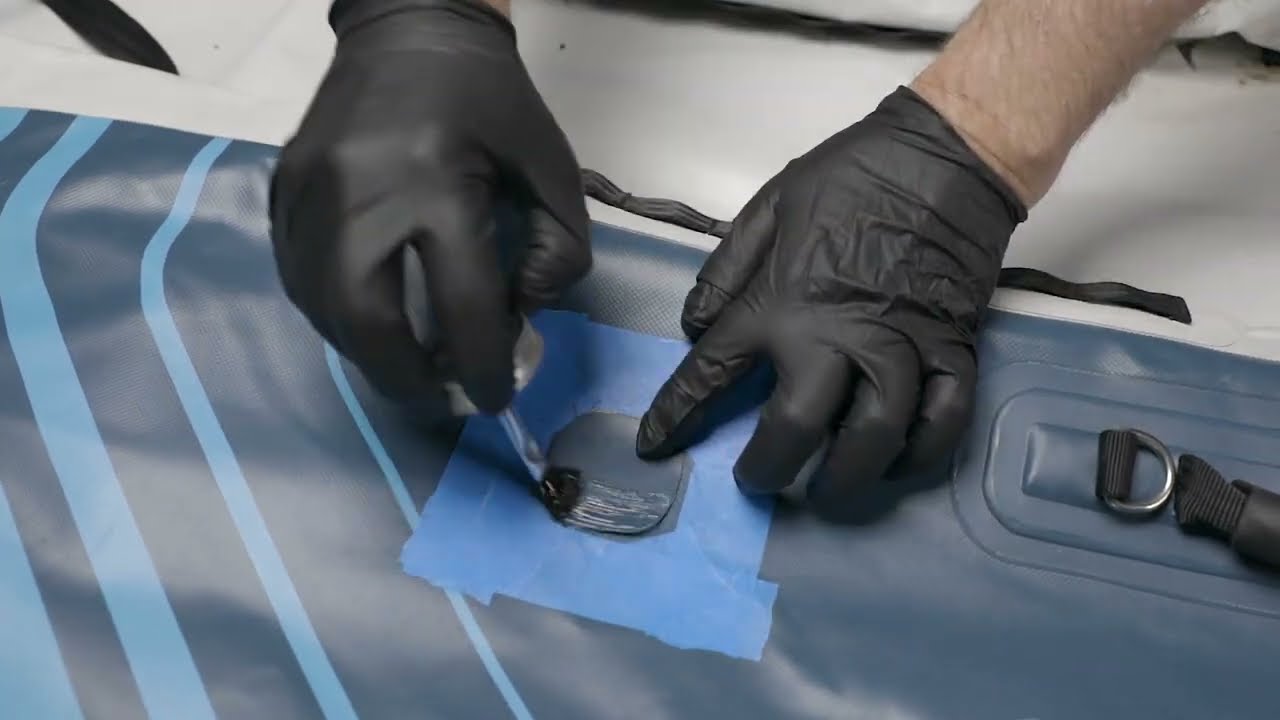
How to Repair Aquaglide Kickitat Leaks or Punctures
Leaks and punctures are probably the most common issues with the Aquaglide Kickitat. If you find a leak, don’t panic. Here’s how to repair Aquaglide Kickitat leaks or punctures:
- Find the leak: Use a mixture of soap and water to find the source of the leak. Apply the mixture to the suspected area and watch for bubbles.
- Deflate the Kickitat: Completely deflate the Kickitat to prevent any further air from escaping.
- Clean the area: Use a soft cloth and some mild soap to clean the area around the leak.
- Apply a patch: Use the repair kit to apply a patch to the affected area. Make sure the patch is centered over the leak and smooth out any air bubbles.
- Allow to dry: Allow the patch to dry completely before inflating the Kickitat again.
How to Repair Aquaglide Kickitat Valve Problems
The valve on your Aquaglide Kickitat is a critical component. If it’s not working properly, you might have trouble inflating or deflating the Kickitat. Here’s how to repair Aquaglide Kickitat valve problems:
- Identify the issue: Determine what’s causing the valve problem. Is it clogged, loose, or broken?
- Clean the valve: Use a small brush and some mild soap to clean out any debris that might be clogging the valve.
- Tighten the valve: If the valve is loose, tighten it by hand or with a wrench.
- Replace the valve: If the valve is broken, you’ll need to replace it with a new one. Use the repair kit to install a new valve.
How to Repair Aquaglide Kickitat Seam Failures
Seam failures are rare but can occur. If you notice a seam failure, don’t panic. Here’s how to repair Aquaglide Kickitat seam failures:
- Deflate the Kickitat: Completely deflate the Kickitat to prevent any further damage.
- Clean the area: Use a soft cloth and some mild soap to clean the area around the seam failure.
- Apply a seam sealant: Use the repair kit to apply a seam sealant to the affected area.
- Allow to dry: Allow the sealant to dry completely before inflating the Kickitat again.
How to Repair Aquaglide Kickitat Footrest or Foothold Damage
The footrest or foothold on your Aquaglide Kickitat is essential for stability and control. If you notice any damage, don’t panic. Here’s how to repair Aquaglide Kickitat footrest or foothold damage:
- Assess the damage: Determine the extent of the damage. Can you repair it, or does it need to be replaced?
- Clean the area: Use a soft cloth and some mild soap to clean the area around the damage.
- Apply a patch: Use the repair kit to apply a patch to the affected area.
- Replace the footrest or foothold: If the damage is extensive, you might need to replace the footrest or foothold entirely.
Tips and Tricks for Repairing Your Aquaglide Kickitat
Here are some tips and tricks for repairing your Aquaglide Kickitat:
- Always follow the manufacturer’s instructions when using repair kits or other materials.
- Use the correct tools for the job to avoid damaging the Kickitat further.
- Work in a clean, dry area to prevent any contamination or moisture from affecting the repair.
- Test the Kickitat after each repair to make sure it’s holding air properly.
Conclusion
Repairing your Aquaglide Kickitat is relatively easy, and with these tips and tricks, you’ll be back out on the water in no time. Remember to always follow the manufacturer’s instructions and use the correct tools and materials to avoid any further damage. How to repair Aquaglide Kickitat is a skill that’s easy to learn and will save you time and money in the long run. Happy paddling.
How to repair Aquaglide Kickitat – it’s easier than you think.