How to Repair Jewelry: The Ultimate Guide
=====================================================
Hey there, jewelry lovers. Are you tired of having broken jewelry just lying around, collecting dust? Well, you’re in luck because today, we’re going to show you how to repair jewelry like a pro. Whether you’re a DIY enthusiast or just a jewelry enthusiast, this guide is perfect for you.
Broken Jewelry? No Problem
We’ve all been there – you’re getting ready for a night out, and you realize your favorite necklace is broken. Or maybe you’re just going about your day, and you feel your ring slip off your finger. Whatever the case, broken jewelry can be frustrating. But don’t worry, with a few simple tools and some basic knowledge, you can learn how to repair jewelry and have it looking good as new in no time.
Gathering Your Tools
Before we dive into the nitty-gritty of how to repair jewelry, let’s talk about the tools you’ll need. Now, don’t worry if you don’t have all of these tools lying around – you can easily find them at your local hardware store or online. Here’s a list of the basic tools you’ll need:
- Flat-nose pliers
- Round-nose pliers
- Wire cutters
- A jewelry loupe (optional)
- A work surface (like a desk or table)
Common Jewelry Repairs
Now that we’ve got our tools, let’s talk about some common jewelry repairs. These are the types of repairs that you’ll likely encounter most often, and they’re also some of the easiest to fix.
Fixing a Broken Clasp
Fixing a broken clasp is one of the most common jewelry repairs. It’s also one of the easiest. Here’s what you need to do:
- Examine the clasp to see what’s wrong. Is it just a loose screw, or is the entire clasp broken?
- If it’s a loose screw, simply tighten it with your flat-nose pliers.
- If the clasp is broken, you’ll need to replace it. To do this, use your wire cutters to remove the old clasp from the necklace or chain.
- Once you’ve removed the old clasp, simply attach the new one using your wire cutters and flat-nose pliers.
Re-Attaching a Loose Stone
Re-attaching a loose stone is another common jewelry repair. Here’s what you need to do:
- Examine the stone to see how it’s attached. Is it held in place by a prong, or is it glued?
- If the stone is held in place by a prong, use your flat-nose pliers to gently bend the prong back into place.
- If the stone is glued, you’ll need to re-glue it. To do this, apply a small amount of jewelry adhesive to the stone and attach it to the jewelry.
Re-Sizing a Ring
Re-sizing a ring is a bit more complicated than some of the other repairs we’ve talked about, but it’s still relatively easy. Here’s what you need to do:
- Determine whether the ring is too small or too large. If it’s too small, you’ll need to make it larger. If it’s too large, you’ll need to make it smaller.
- Use your flat-nose pliers to make the necessary adjustments. If you’re making the ring larger, you’ll need to carefully pry it open. If you’re making it smaller, you’ll need to carefully squeeze it shut.
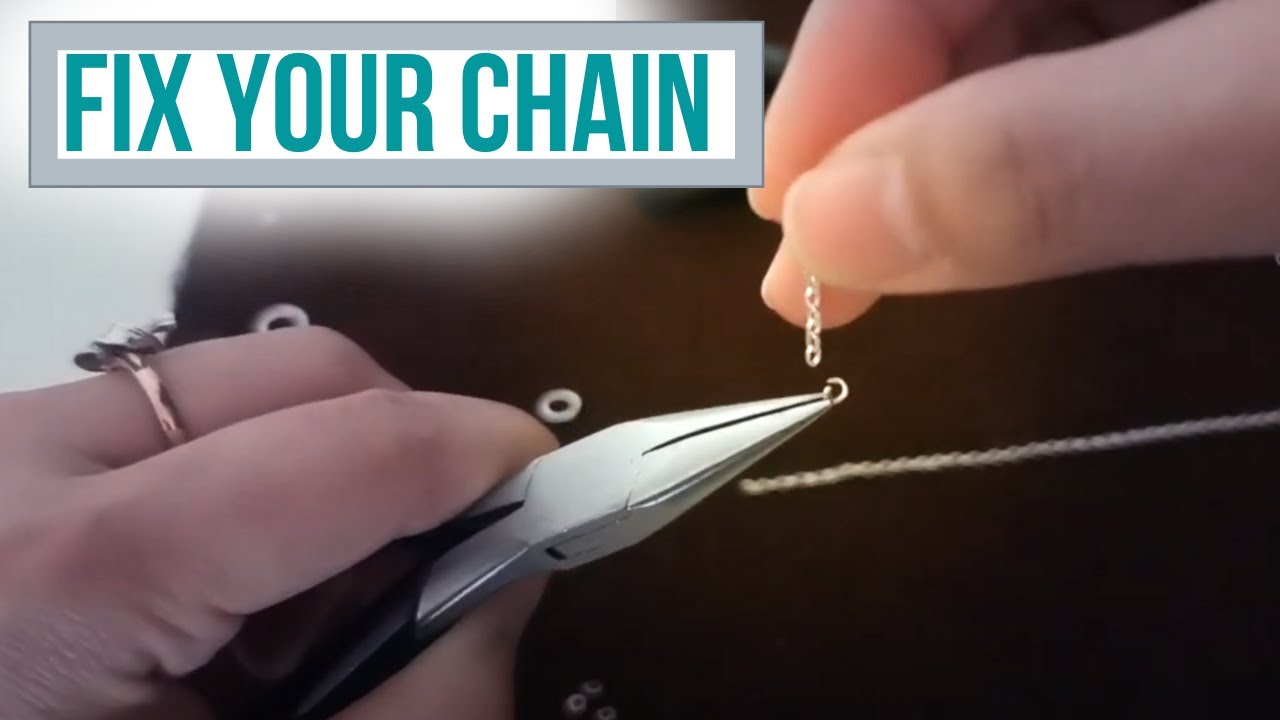
Repairing a Broken Chain
Repairing a broken chain is another common jewelry repair. Here’s what you need to do:
- Examine the chain to see where it’s broken. Is it a simple break, or is it more complicated?
- If it’s a simple break, you can simply use your wire cutters to remove the broken link and attach a new one.
- If it’s more complicated, you may need to use your flat-nose pliers to carefully pry the links apart and re-attach them.
Advanced Jewelry Repairs
Now that we’ve talked about some common jewelry repairs, let’s talk about some more advanced repairs. These are the types of repairs that require a bit more knowledge and skill, but they’re still worth learning how to do.
Re-Setting a Stone
Re-setting a stone is an advanced jewelry repair that requires a bit more skill. Here’s what you need to do:
- Examine the stone to see how it’s attached. Is it held in place by a prong, or is it glued?
- If the stone is held in place by a prong, use your flat-nose pliers to carefully remove the prong and then re-attach it.
- If the stone is glued, you’ll need to re-glue it. To do this, apply a small amount of jewelry adhesive to the stone and attach it to the jewelry.
Re-Plating Jewelry
Re-plating jewelry is another advanced repair that requires a bit more knowledge. Here’s what you need to do:
- Examine the jewelry to see if it’s worth re-plating. Some types of jewelry, like costume jewelry, may not be worth re-plating.
- If you’ve decided to re-plate the jewelry, use a jewelry plating kit to remove the old plating and apply new plating.
Tips and Tricks for Repairing Jewelry
Now that we’ve talked about some common and advanced jewelry repairs, let’s talk about some tips and tricks for repairing jewelry. Here are a few things to keep in mind:
- Always use the right tools for the job. Using the wrong tools can damage the jewelry and make the repair more difficult.
- Always work in a well-lit area. This will help you see what you’re doing and avoid making mistakes.
- Always use a work surface, like a desk or table, to prevent the jewelry from getting lost or damaged.
- Always be patient and take your time. Repairing jewelry can be frustrating, but it’s worth taking the time to do it right.
Conclusion
And there you have it, folks. That’s how to repair jewelry like a pro. Whether you’re a DIY enthusiast or just a jewelry enthusiast, this guide has shown you that repairing jewelry is easier than you think. With a few simple tools and some basic knowledge, you can fix broken clasps, re-attach loose stones, and even re-plate jewelry. So next time you’ve got a broken piece of jewelry, don’t throw it away – try fixing it yourself. With practice and patience, you’ll be a jewelry-repairing pro in no time.
How to Repair Jewelry: Final Tips
Before we go, here are a few final tips for repairing jewelry:
- Practice makes perfect. Don’t be discouraged if your first few attempts at repairing jewelry don’t turn out perfectly. With practice, you’ll get better.
- Use online tutorials to help you learn. There are many online tutorials and videos that can help you learn how to repair jewelry.
- Take your time and be patient. Repairing jewelry can be frustrating, but it’s worth taking the time to do it right.
By following these tips and practicing your skills, you’ll be a jewelry-repairing pro in no time. Happy repairing!