How to Repair Leather Jacket: A Step-by-Step Guide
=====================================================
Hey there, fellow leather jacket lovers. If you’re here, chances are you’ve got a favorite leather jacket that’s seen better days. Maybe it’s got a tear, a rip, or some worn-out spots that need fixin’. Well, don’t worry, you’ve come to the right place. In this article, we’ll show you how to repair leather jacket like a pro.
Assessing the Damage
Before you start fixin’ that jacket, take a good look at the damage. Check for any tears, rips, or worn-out spots. Inspect the stitching, zippers, and other hardware to see if they’re still in good condition. This will help you figure out what you need to repair and what you can leave alone.
Identifying the Type of Leather
When it comes to leather jackets, there are several types of leather to consider. Here are some common ones:
- Full-grain leather: This is the highest quality leather, made from the strongest and most durable part of the hide.
- Top-grain leather: This type of leather is also high-quality, but it’s been sanded to remove imperfections.
- Bonded leather: This is a lower-quality leather made from leftover scraps of leather that have been bonded together.
-
Suede leather: This type of leather is soft and velvety, but it’s also more delicate and prone to stains.
Knowing what type of leather your jacket is made of will help you determine the best approach for repair.
Gather Your Tools and Supplies
When it comes to how to repair leather jacket, you’ll need some basic tools and supplies. Here are the essentials:
- Leather patching kit (available at most craft stores)
- Leather conditioner or leather oil
- Leather adhesive (like contact cement)
- Needle and thread
- Scissors
- Leather brushes (for cleaning and conditioning)
Optional Supplies
Depending on the type of repair you need to do, you may also want to have some of these optional supplies on hand:
- Leather dye or paint (for color-matching)
- Leather filler (for filling in holes or gaps)
- Leather sealer (for protecting the leather from water and stains)
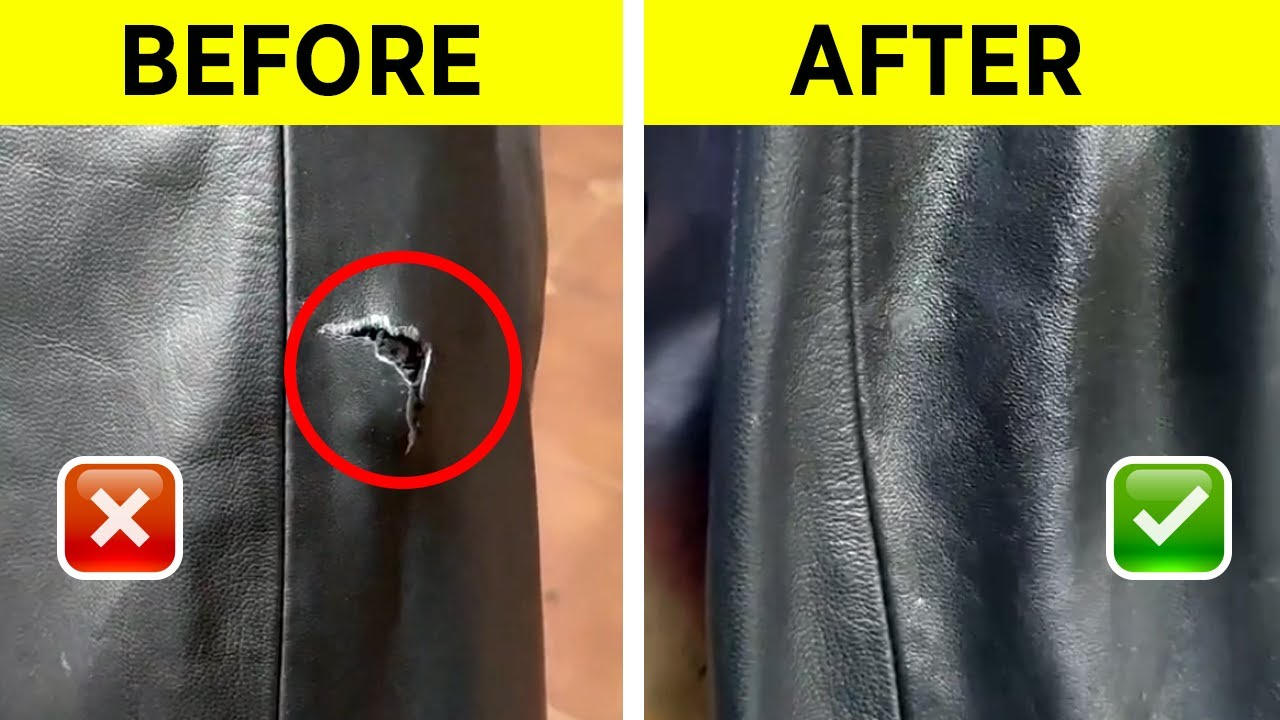
Repairing Tears and Rips
Okay, now it’s time to get started on those tears and rips.
Using a Leather Patching Kit
If the tear or rip is small, you can use a leather patching kit to fix it. Here’s how:
- Clean the area around the tear with a leather brush and some leather conditioner.
- Cut a piece of leather patch to fit over the tear, leaving a little extra around the edges.
- Apply some leather adhesive to the back of the patch and press it onto the jacket.
- Let it dry completely before wearing the jacket.
Using Needle and Thread
For larger tears or rips, you may need to use a needle and thread to sew the jacket back together. Here’s how:
- Thread your needle with some leather thread (or regular thread that matches the color of your jacket).
- Sew along the edge of the tear, using small, even stitches.
- Make sure to sew in the same direction as the original stitches.
Replacing Zippers and Hardware
If your jacket’s zippers or hardware are broken or worn out, you can replace them yourself. Here’s how:
Replacing Zippers
- Remove the old zipper by carefully pulling it out of the jacket.
- Measure the length of the zipper you need to replace it.
- Cut a new zipper to the right length and sew it into the jacket.
Replacing Hardware
- Remove the old hardware (like buttons or buckles) by unscrewing or prying it off.
- Install the new hardware in its place.
Conditioning and Protecting the Leather
Once you’ve repaired your jacket, you’ll want to condition and protect the leather to keep it looking its best. Here’s how:
Conditioning the Leather
- Apply a leather conditioner to a soft cloth.
- Rub the conditioner into the leather, using circular motions.
- Let it dry completely before wearing the jacket.
Protecting the Leather
- Apply a leather sealer to a soft cloth.
- Rub the sealer into the leather, using circular motions.
- Let it dry completely before wearing the jacket.
Tips and Tricks
Here are some additional tips and tricks for repairing your leather jacket:
- Always test a small area of the leather before applying any adhesives or conditioners.
- Use a leather brush to clean the leather and remove any dirt or debris.
- Avoid using harsh chemicals or abrasive cleaners on your leather jacket.
- Consider using a leather protector or waterproofing spray to protect the leather from the elements.
Conclusion
And there you have it – a step-by-step guide on how to repair leather jacket like a pro. With the right tools and supplies, you can fix those tears and rips and get your jacket looking its best. Remember to condition and protect the leather to keep it looking its best, and don’t be afraid to experiment and try new things.
Now, go forth and fix that jacket. Happy repairing.
How to repair leather jacket is easier than you think, and with these tips and tricks, you’ll be well on your way to becoming a leather repair pro.