How to Repair Rubber Boots: A Step-by-Step Guide
Why Repair Your Rubber Boots?
You and me, we know how frustrating it can be to have to toss out our favorite pair of rubber boots just because they’ve got a few holes or cracks. Not only is it a waste of money, but it’s also bad for the environment. But, did you know that you can learn how to repair rubber boots and extend their lifespan? In this article, we’ll walk you through the process of fixing common issues with your rubber boots, from holes and cracks to loose soles and more.
Gather Your Materials
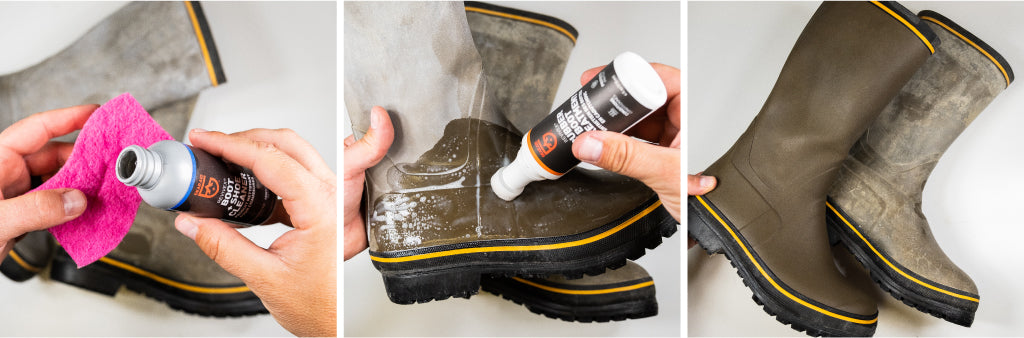
Before we dive in, let’s talk about the materials you’ll need to how to repair rubber boots. You’ll need:
- Rubber cement (also known as contact cement)
- Rubber patches (available at most outdoor gear stores or online)
- A patch kit specifically designed for rubber boots
- A leather or fabric patch for extra protection
- A sharp utility knife or scissors
- Sandpaper (optional)
- A hair dryer or heat gun (optional)
Fixing Holes and Cracks
Holes and cracks are the most common issues with rubber boots. But, don’t worry, how to repair rubber boots with holes and cracks is easier than you think.
Step 1: Clean the Area
Before you start repairing the hole or crack, make sure the area is clean and dry. Use some soap and water to scrub away any dirt or debris, and let it dry completely.
Step 2: Apply Rubber Cement
Once the area is clean and dry, apply a layer of rubber cement to the hole or crack. Make sure to follow the instructions on the cement packaging for application and drying times.
Step 3: Apply the Patch
Cut a patch of rubber to the right size and shape to cover the hole or crack. Apply another layer of rubber cement to the back of the patch and press it firmly onto the boot. Use a bit of pressure to make sure it adheres properly.
Step 4: Add Extra Protection (Optional)
If you want to add some extra protection to the patch, you can use a leather or fabric patch on top of the rubber one. Simply cut the patch to size, apply some rubber cement, and press it firmly onto the boot.
Fixing Loose Soles
Loose soles can be a real pain, especially if you’re using your rubber boots for work or hiking. But, how to repair rubber boots with loose soles is a piece of cake.
Step 1: Remove the Old Adhesive
Use a utility knife or scissors to scrape away the old adhesive from the sole and the boot. Be careful not to damage the surrounding material.
Step 2: Clean the Area
Once you’ve removed the old adhesive, clean the area with some soap and water. Let it dry completely before proceeding.
Step 3: Apply New Adhesive
Apply a layer of rubber cement to the sole and the boot, making sure to follow the instructions on the packaging. Press the sole firmly onto the boot, making sure it’s centered and secure.
Step 4: Add Extra Support (Optional)
If you want to add some extra support to the sole, you can use some additional adhesive or even some screws (if the boot is designed for them). Just make sure not to overtighten the screws, as this can damage the boot.
Fixing Leaks
Leaks can be a real problem with rubber boots, especially if you’re using them in wet conditions. But, how to repair rubber boots with leaks is easier than you think.
Step 1: Locate the Leak
First, you need to locate the source of the leak. Fill the boot with water and mark the spot where the water is coming out.
Step 2: Clean the Area
Once you’ve located the leak, clean the area with some soap and water. Let it dry completely before proceeding.
Step 3: Apply Rubber Cement
Apply a layer of rubber cement to the affected area, making sure to follow the instructions on the packaging. Use a bit of pressure to make sure it adheres properly.
Step 4: Add a Patch (Optional)
If the leak is particularly bad, you may want to add a patch on top of the cement. Simply cut a patch of rubber to the right size and shape, apply some rubber cement, and press it firmly onto the boot.
Closing
And there you have it, folks! How to repair rubber boots is easier than you think, and with the right materials and a bit of know-how, you can fix common issues like holes, cracks, loose soles, and leaks. So, next time your rubber boots start to fall apart, don’t toss them out – fix them instead!
How to Repair Rubber Boots: Tips and Tricks
- Always clean the area before applying any cement or patches.
- Use the right type of cement for the job – rubber cement is best for rubber boots.
- Apply pressure to make sure the cement or patch adheres properly.
- Use a patch kit specifically designed for rubber boots for the best results.
- Don’t be afraid to add extra support or protection to your repairs – it’s better to be safe than sorry.
By following these simple steps and tips, you can how to repair rubber boots like a pro and extend the lifespan of your favorite pair of boots. So, what are you waiting for? Get out there and start repairing!